Tuesday, April 23, 2013

What I do While Watching TV...

I love to find little projects that I can do while watching TV, although I don't watch much, I can't miss The Voice on Mondays and Tuesdays.  So last night while I was tuning in, I started filling one of my vintage photo albums with my favorite black and white vintage photos.  I bought a sharpie paint pen to draw some simple decoration around each photo but let me tell you, this pen is TERRIBLE.  It just soaks into the paper...I had to go over it about 10 times to get it to look like this...not what I had in mind.  Luckily the pages can be removed but in the meantime, I need to find a good pen and start over...If anyone knows of a white pen that will look brilliant on black paper, please let me know!

I picked up this cute little pile of fabrics at a quilt shop in White Bear Lake...I think they will become fabric journals...eventually.

Another thing that's great to do in front of the TV is quilt.  I finished this circle quilt a few weeks ago...thought I'd give it to my oldest son as his childhood quilt is literally threadbare...but he wasn't too keen on the vintage floral sheet I used as the backing.  Alas, I have to keep it for myself.

I've never used colored quilting thread before but I really like how this blue turned out. 
And finally, this is the scrap quilt I'm currently working on...it's just a huge pile of my fabric scraps all sewn together.  It's a little wonky in some places but I love that.  A few more weeks and this one should be done as well...maybe by that time our snowy weather will have finally turned to spring-like weather...then no more TV!

Friday, April 19, 2013

Super Duper Junk Journal...


Last summer, my niece, Madison, made this cute journal for me with all sorts of random papers, sticky notes, ephemera and tags with her own artwork on them.  It's the cutest little thing. 
Since I save everything...clothing tags, address labels, used envelopes, price tags, postcards, soap wrappers (you get the point)...I decided to make this into my "Super Duper Awesome Junk Journal".  I needed to do something with all my hoarded saved junk.  I have so much of it my little plastic bin was overflowing, but I couldn't bring myself to throw anything out.

My niece will be back in Minnesota in a few months and I can't wait to show her all the awesome goodness!


I have about 1 and 1/2 empty pages but I used most of the true "ephemera" I saved...all that's left in my plastic bin are journaling cards and stuff that was just too big for this project.

There's something about the feel of big, bulky, crinkly, scrummy pages that makes me really happy!

I just hope that one day you don't see me on an episode of "Hoarders: Buried Alive"!

Tuesday, April 16, 2013

Paint your Story...

I've admired Mindy Lacefield's colorful and fun artwork for quite a while now and was completely in awe watching one of the early videos of her painting...totally love her style!  Mindy offers a variety of online classes and I've longed to take her "Paint your Story" class but when I first saw it I just felt like I wouldn't have time to really delve into it and commit...but things have changed and now the time is right!  I got started immediately after signing up...first step is pinning and gathering inspiration...and I'm having a blast just doing that! You can check out my Pinterest boards here and you can sign up for any one of Mindy's classes here. Stay tuned...first masterpiece coming soon!

Sunday, April 14, 2013

Shop Update...

Is my header photo big enough?  I'm not very tech savvy so bear with my while I figure things out!

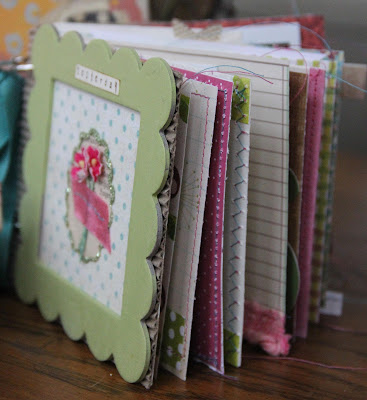
This paper and fabric album/journal was added to Etsy this morning.  For 10% all sales through the end of April us coupon code "SPRINGSALE" at checkout.

Lots of room for photos AND journaling in this album...

(This photo was not included on Etsy since I'm limited to five photos)

Pages for photos...

Pages for Journaling and photos

Pocket with two handmade tags...

Back cover...

And since I'm in the thick of spring cleaning...more ephemera kits!

Thursday, April 11, 2013

Crafting Fun...

It's April 11, 2013 and we're under a winter weather advisory here in Minnesota.  I'm so done with winter and it's been such a long and dreadful one that I'm beginning to wonder if we'll ever see spring...let alone summer!  Since I can't be outdoors working in the yard yet, I've been in my studio making stuff...doesn't matter what I'm making as long as I'm doing something!

I decided to make a little mini album from scraps of leftover paper since my scrap box was literally overflowing.  It's perfect for all my Instax that have been piling up...I had so many that the album is just about full.  I mainly take photos of the youngest because he wears glasses and if the flash hits them just right, it flaws the film making him look (to me) like Mad-Eye Moody (Harry Potter)...I think it's funny...but him...not so much.  So far he still puts up with it but I think it's only a matter of time!


More decorated paper mache boxes...I decided to switch it up from the mushroom ones I went crazy with this weekend.  A person only needs so many mushroom boxes!

And I have to tell you, I am completely smitten with collage/mixed media.  I never thought it would be anything I would take an interest in but there's something about piling on the layers of paper and paint...and being able to change things with just a color swap or more paint...love, love, love it...and this is my first encaustic on my own...didn't turn out as well as I'd hoped but I like it and that's all that counts, right?

Monday, April 8, 2013

Holy Mary Collage...

So Friday at Art Group, Valerie taught us how to do an encaustic collage.  I hated my finished canvas...just didn't like anything about it and couldn't change it to make it more likeable...it was hopeless...So I decided to start over.

I really love vintage religious items so I decided to make a Virgin Mary collage...I didn't do the whole wax thing...maybe next time.  I could really get addicted to collage work!

And I definitely like this one much better.  Wish I had a good photo of my original one to show you what a disaster it was!

Saturday, April 6, 2013

Mushroom Box Tutorial


Last night was our monthly Art Group, Val taught us how to make fun encaustic collages.  I don't collage very often but since my supplies were still out from last night, I decided to do something with a few wood boxes I had laying around.  I originally intended to use them for a different project but they didnt quite fit what I needed.  I'm my own worst critic, as most of us are,  but I actually like the finished product so thought I'd share with you how to make your own.

1.  Draw lines around the bottom of your box as a guide for the paint.  You can use a paper mache box or a thin wood box like I used (it's either balsam or beachwood...don't remember the technical name).  You can find these at any craft supply store like JoAnns, Michaels or Hobby Lobby.
2.  Paint inside the lines with watercolor paint but don't worry about staying perfectly inside the lines, the messier the better.  Also paint the inside of the box in addition to the outside of the lid with acrylic paints (although you could use watercolors as well)
3.  Trace the outline of the lid on the paper you choose to use for the top of the lid.  I used an old ledger page.  Cut just inside the line for a nice, smooth fit.
4.  Cut out your illustration...you can use anything you like, mushrooms, birds, flowers, etc.
5.  Mod Podge your ledger paper to the top of the lid first.  I've found that applying Mod Podge to just the box lid works best...sometimes applying it to both the lid and the paper creates air bubbles and it doesn't look as nice.  Smooth it down with your fingers nice and tight with your fingers.  Next, apply Mod Podge to your illustration and adhere it to the lid.  Now is the time to add any other embellishments you want.  I added dennison labels to both boxes and little red painted dots around one of the boxes.  When everything has been "glued" on and all painted embellishments have dried completely, put a final layer of Mod Podge over the entire lid.  
6.  After the final layer of Mod Podge has completely, apply a layer of "One Step Crackle" finish to the top of lid, sides of lid, and sides of box.  I use DecoArt found at Michaels.  You can skip this step if you can't find one step crackle.  After the crackle coat dries, rub brown acrylic paint into the cracks with a damp paper towel to give it an aged look.
7.  Finally, tie a bow around the lid.  I used a strip of old cheese cloth to give it a shabby, worn look.
8.  Sit back and admire you work!
ED:  If you're going to make your own mushroom boxes, make sure you don't copy the way in which I spelled Specimen...it's 'EN', not 'AN' as I have shown in the photos...lucky for me I was able to change it without too much hassle!