Aaah...I can't believe I haven't posted since last Tuesday! Shelby came home for the weekend, it's been about a month since she's been home, so we were busy shopping, shopping, shopping...no time for blogging. I thought I was getting used to the idea of her being gone but I guess I was wrong, no need to bore you with the details of the tearful parting (even though she'll be back in two weeks for spring break) but I'm sure one of these months I'll be able to drop her back at the dorms without crying half the way home!
I wasn't too busy though to work on my
Trash to Treasure project for today. I'm not sure if this was originally a feed sack or a pillowcase, either way, I fell in love with the pattern on the fabric as soon as I saw it sitting all alone in a bin at a flea market.

I saw this adorable sort of "shoe organizer" type thing in an old
Victoria magazine and decided it would be the perfect thing for my fabric. First I decided how big I wanted the organizer and cut the fabric leaving enough extra for the hems.

Next I cut the remaining fabric into 6" wide strips, "hemmed" all the edges and started pinning where I wanted the pockets to go...I only had a certain amount of fabric so that pretty much dictated the size of each pocket.

Then I sewed everything in place and here you have the finished product:


As soon as I convert Shelby's room into my "new" studio I'll find a permanent place for this little treasure...don't tell Shelby I'm kicking her out of her room though...she may never come home then!
 A few weekends ago, I stopped at one of my favorite Thrift Stores my way home from a day of treasure hunting with my friend Kate...and this little beauty was just sitting there waiting for me!
 If I told you what I paid for it you wouldn't believe me...I think someone mis-marked it because aside from being scratched up, there was absolutely nothing wrong with it!
 After two coats of Glidden's Barely Jade, this is what it looks like today...
 And it's perfect for holding all my handmade books and journals!


 We scraped, sanded, and stripped all weekend and finally gave up when our bodies couldn't take any more.
  Here is it in it's final resting place...full of cardstock, fabric, wool, felt and all sorts of other craft junk.
 I've been spending a lot of time in my studio making Christmas goodies. I'm setting up a table at
  After....


 I decided on a nice antique white satin finish...it's Glidden Quiet Light to be exact. I put on three coats to make sure it looked pretty...
  And here it is all finished sitting nicely in the family room...
 I love the antique hardware...
 Do you think we can get Sebastian off the kitchen table now? No, you're right, probably not. That little project turned out so well I decided to paint this little cabinet pink...Benjamin Moore Soft Cranberry...


 Now everytime I walk into the family room and see them laying there I say "aren't my pillows pretty?" to whomever is listening...funny thing is I never seem to get an answer. Oh well.
 1. To begin the transformation I painted everything with a light coat of Apple Barrel acrylic paint in Victorian Green (love that color). After it dried I painted a light coat of crackle medium over the green areas. I used a light coat for smaller cracks...the heavier the coat the larger the cracks.
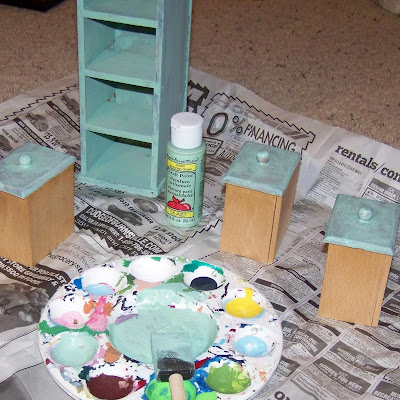 2. After that dried I painted over the crackle medium with another coat of the same Apple Barrel paint.
 3. I used little stamped scraps of ledger paper as drawer labels. I hammered little pronged bezels that I purchased from

 My trash to treasure items are starting to pile up in my studio so I'll be putting this little goodie up for sale in my
  The underside of the lid has a great old mirror and there are two little compartments for treasures inside. The bottom of the box is a piece of glass with a plain old piece of cardboard underneath so it's not very pretty to look at.
 I started by cleaning the top glass, the mirror and the bottom glass (it was really dirty!)
 Unfortunately there was no way to disassemble the lid without totalling ruining it so all I could do was cover it with floral paper (it slid under the wooden frame rather easily).


 After pondering the odd little wheel day after day I finally came up with an idea of what I would do with it so I gathered some of my favorite vintage goodies and started playing around.
 Here's the final product...hopefully you can get an idea of how cute it turned out despite my horrible photography!


